As a newb, I have been wondering if there is a cheat sheet/quick reference somewhere that I have missed that explains what some of the common abbreviations mean that people use in the posted patches here.
There is often an ‘o’ or an ‘a’ or a ‘g’ in an input/output glyph – and probably other letters as well – it would be nice if there were a cheat sheet of basic things like this and other things that newbs might need to be reminded about. Maybe something in the Audulus directory that gets installed with the app. (I’m using it on iOS).
2 Likes
Btw, I think that I have pieced together that ‘0’ is 1/octave for note input. ‘g’ is gate and ‘a’ is maybe audio. Is ‘m’ modulator?
1 Like
https://discourse.audulus.com/t/audulus-3-library-reface/1455/87
This is the ongoing project to fix the confusion. These new modules will be more well labeled and easier to comb through. Download the latest zip and try a few of them out!
Basically g is gate, a is audio, m is modulation, o is 1/octave. Connect like to like generally 
2 Likes
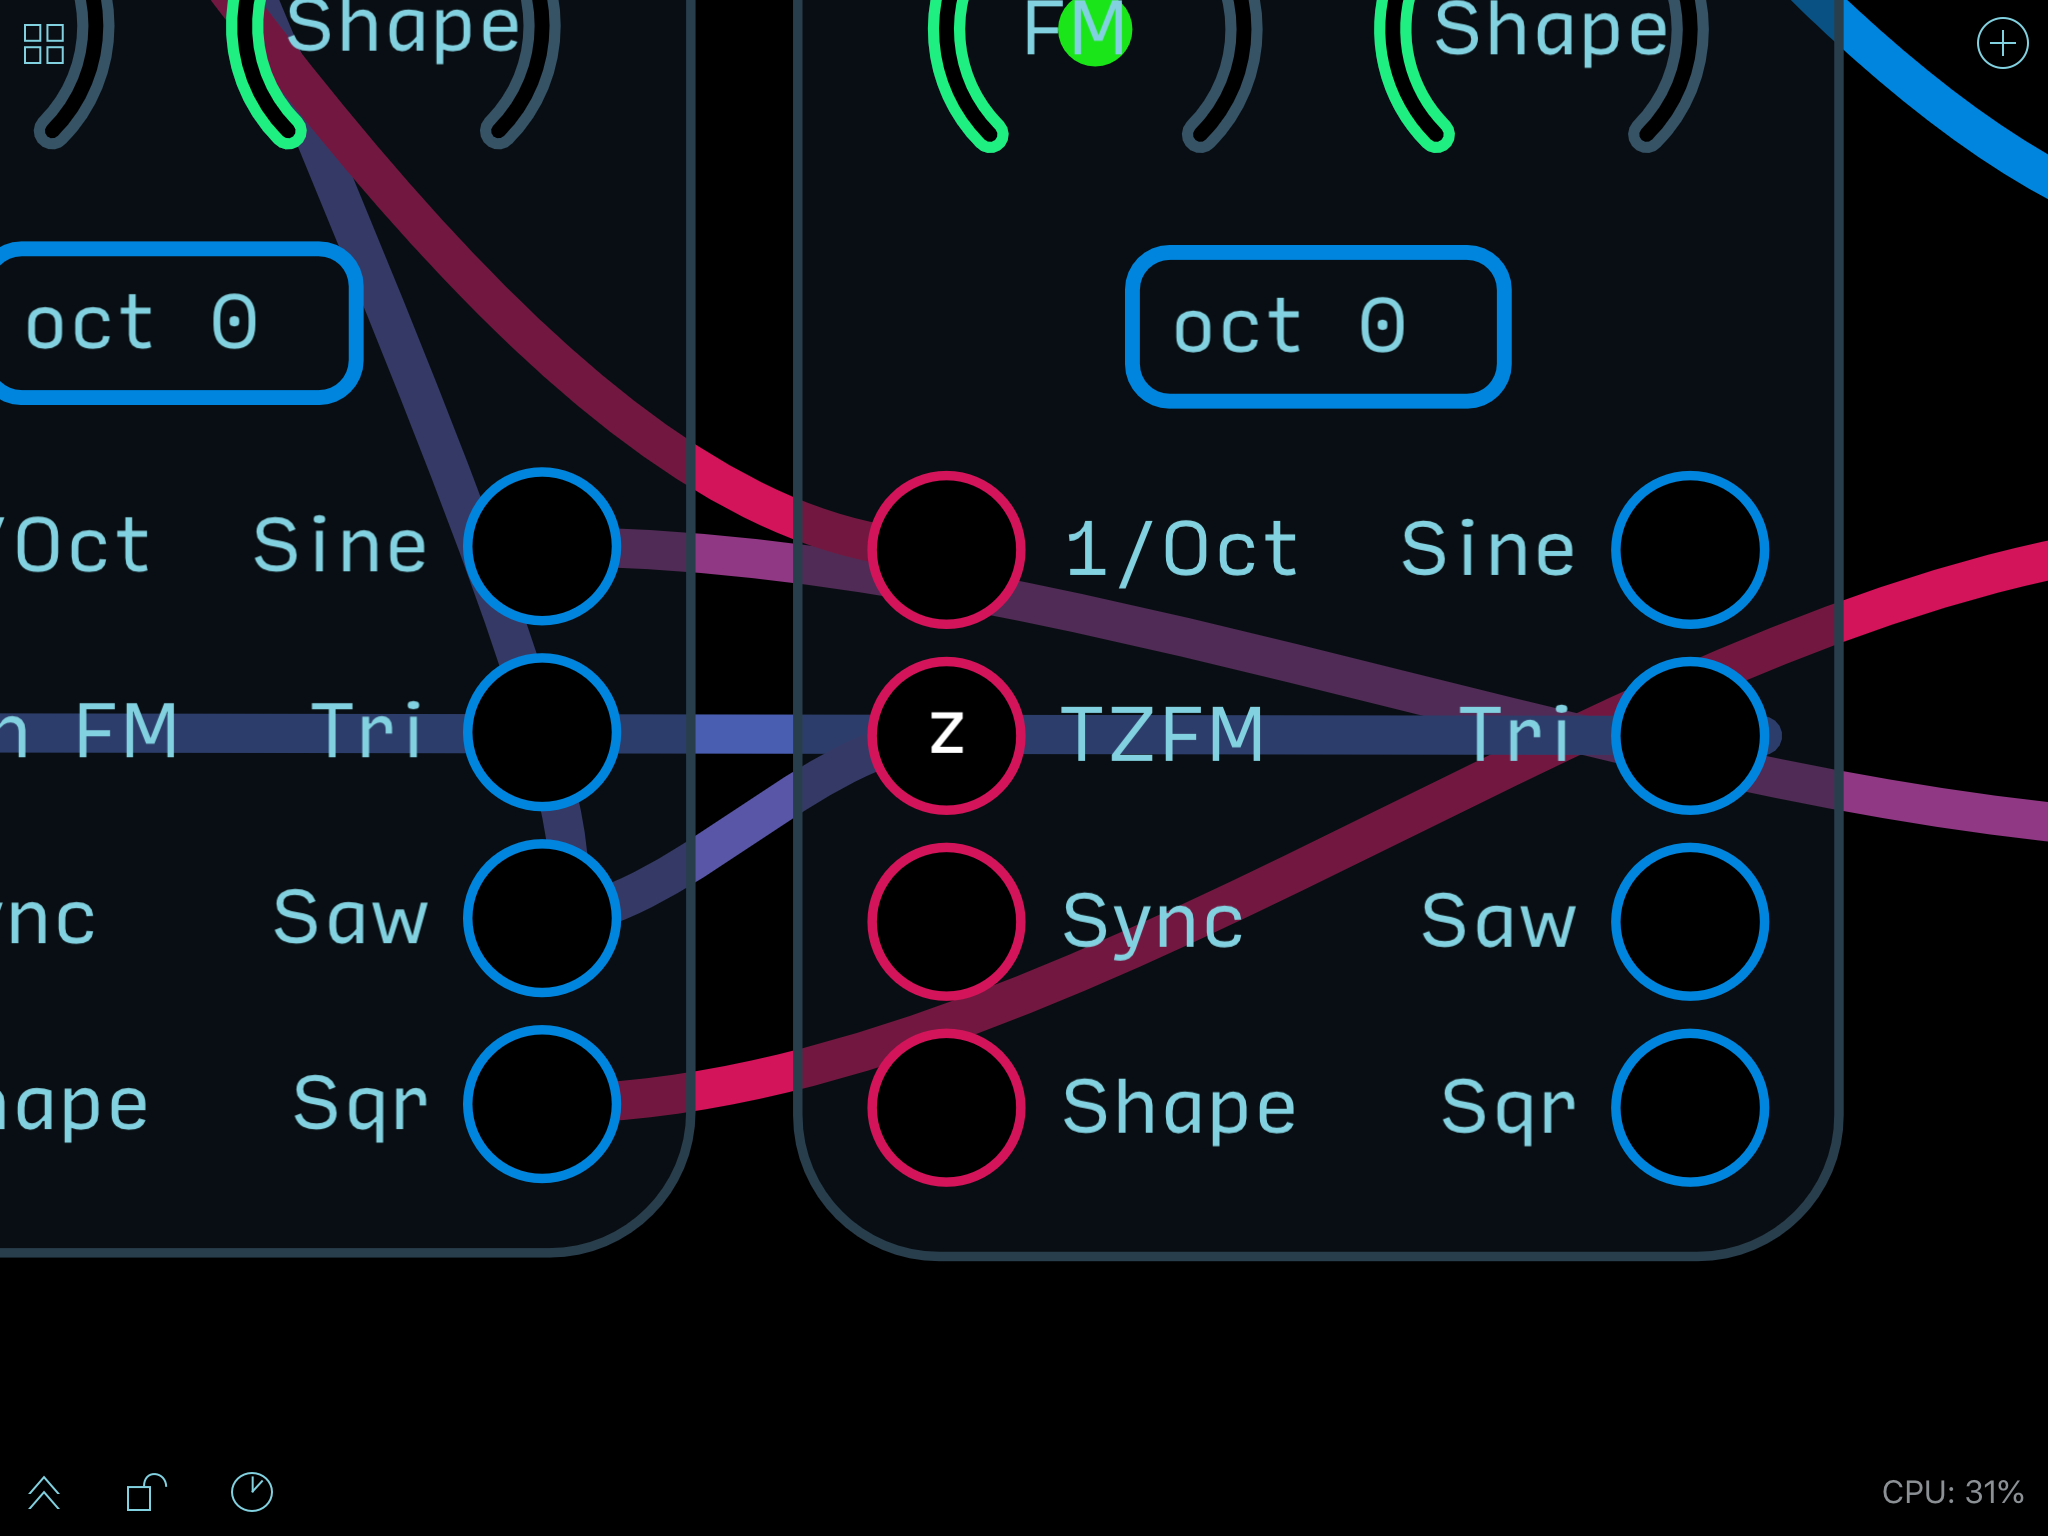
Is there a module with a z?
That’s the indicator for a feedback loop. It shows you where the feedback delay is present. z is a variable for delay, so z-1 is a single sample delay, for example.
It’s not a letter that is put there with a node like these others were, it just automatically appears. If you use the FeedbackDelay node or the UnitDelay node, you can explicitly determine where the delay occurs. If not, Audulus will just try to guess where to put it.
You need a feedback delay because you can’t compute a result that depends on itself instantaneously. Like create an expression node where 1+x=x and attach a value node - you’ll notice it count up really quickly - that’s because there’s a small delay in the calculation of the input x and the output of the 1+x expression. Use a UnitDelay between the output and x and it will count even faster.
2 Likes
So Audulus has already made the adjustment to the sequence and if I wanted to I could use the feedback delay node to specify the input for the single sample delay to occur?
1 Like
The feedback delay node will put the feedback delay in a particular point in the feedback loop, which you need to do to get certain things to work, like a change detector. A unit delay acts like a feedback delay node but it tells audulus to process everything in that loop in single sample mode. This means that instead of calculating outputs in batches of ~300 samples, it calculates every single sample and reevaluates the entire loop. This is important to do in situations where feedback is normally instantaneous like in an analog filter. It will never be exactly like analog, but the small time delay approximates it. This is also why a higher sample rate can improve sound quality in a modelled filter, as it is more closely approximating the real thing the faster the calculations get.
So you use one or the other, not both. You want to avoid using unit delay when it’s not impotant for the processing to happen quickly, like in a flipflop or a counter. Just where it needs to happen at audio rate, like in a filter or feedback distortion.
“Look a loose thread. I’ll yank on it…Oh no, the Universe!”
It was nice having a glimpse at the dense forest from a hilltop.
I pulled the cable out of the linear fm input, which of course made the ‘z’ go away.
2 Likes
Is there a simple tutorial video or Audulus project that demonstrates the basics of using the sequencer modules (for example, the 4-step rnr and the basic random chance 4-step sequencer)? My main questions are:
- how do you set the pitch range of the sequencer
- simple example of the care and feeding of the r and rs inputs
It would also be helpful if some of these modules had tips inside about common connections.
I have found a number of examples that use them, but they are somewhat daunting for a newb. Maybe, I’ve overlooked some resource. The module docs gives an idea about the reeding the rs with output of a clock divider (helpful) but not about pitch range.
Thanks for the help and great supports.
1 Like
Is there some trick when you group a couple of subpatches that have used-interfaces to keep the exposed elements exposed? I haven’t figured out how to propagate the u.i. From a group made up of suboatches to the parent.
There’s no automatic way to do this (although apparently it will be possible in the next version of Audulus).
The UI elements need to be recreated. For example if you have a frequency knob in a sub patch, then you would have to create a frequency knob in the top level patch and connect it internally to the sub patch frequency knob.
1 Like
Fine-tuning knob position on iOS. Is there a trick to making sure a knob’s value doesn’t jump as you release it.
I’ve been using some knobs whose output gets scaled in some way (the carrier frequency in WestCat) and I am trying to dial in a 2 but when I release my finger the number can jump quite a bit. I can’t just use ‘set value’ because the way that the knob’s value is mapped.
I thought I read somewhere that there is a trick to making fine incremental knob adjustments.
1 Like
Zooming in closer should help - also lifting your finger directly up. Using a stylus can help too! 
I encountered this problem quite a lot, especially when trying to make fine pitch adjustments where small increments make a clear audible difference. Using a stylus does help, but I was wondering if there couldn’t be some kind of software feature to ease these situations – something along the lines of the technique used to create straight lines in the Procreate and Paper drawing apps where of holding for a second of two before lifting after drawing a line, will turn it into a perfectly straight line.
1 Like
This issue is a real drag on an iPad. I didn’t notice it till now because I wasn’t doing precision work before. I have seen other apps that address this issue in different ways. In one, if you set a second finger down it switches to a fine adjustment mode. It is hard with some of the oscillators to be precise with detuning.
1 Like
If you describe or upload the patch you’re looking to fine tune, I can show you how to scale the knob so it’s easier to tune. You can also use a floor(x*precision)/precision expression to make the knob snap to values.
1 Like
Both scaling and snapping are useful techniques. In some cases I’ve found it helpful to add a value node display so that one can view a number that can be used to set the value of the knob. Nevertheless I think that some invisible software help in the background could be a huge improvement to using the knobs on iOS – the difference between a Behringer and a nice big Moog style (performance) knob. (The drawing apps benefit hugely from this kind of invisible help, as does the iOS on screen keyboard for that matter.)
1 Like
The techniques you mention are useful, and, in my opinion, on top of those, it would be useful to refine the way that knobs are implemented to make it easier to have the knob value not change by much when you release. There are apps that have strategies for doing that. It may seem like a little thing, but I think there are little details like this that are probably discouraging for people that aren’t fully-committed to Audulus.
It was working with the WestCat oscillator when I ran into it. I needed to tune the carrier so that the ratio was 3:2 (since 1.5 isn’t a selectable ratio, and I didn’t feel like reprogramming the module.) Getting a 2 or anything close was very hit and miss. The knob would be at 1.99 (which would have been fine for me and jump to 1.76 (not good) or 2.3 or something not very close when I released my finger. I think some minor adjustment to how the knobs work in general could probably eliminate the issue.
1 Like